My Other Math Sites
Lessons From the Classroom
"Working Together" Problem
Heya, back-to-back post about a problem from Five Triangles mathematics.
When I tweeted how much I love this problem, a few people did not feel the same at all. Here are my reasons for appreciating this problem:
It's a notched up "working together" problem that I have not seen before.
It has percentages and fractions.
I can use rectangles to solve this. (I was asked on Twitter how I would solve this using rectangles, hence this post.)
I had to work on this problem. This is a big reason for me. We should assume that if we're teaching a particular math subject — Geometry, Statistics, or Calculus — that we're able to easily do all the exercises in the textbook. A set of exercises allows us to practice a particular skill. But a problem should require us to think. I hope I've encouraged problem-solving enough with my students that they value a problem more when they have to struggle with it, when they don't know immediately how to start it, when they get stuck and become frustrated, when they seek others for help, when they can leave the problem and come back to it another day.
While I'm at it, I also love the site Five Triangles in general for a couple of reasons:
The Geometry problems are simply stated and interesting. They make me pause and think, very few have been automatic gimmes.
The solutions are not posted. I really appreciate this because if they were, we might be tempted (mainly due to lack of time) to check the answers too early before we allow ourselves a chance to work through the problem and perhaps struggle with it. "Anticipating" is the first of 5 Practices that gives us insight on how students might solve the problem.
I did, however, retype the question above so it's easier to read and track information. I also numbered the paragraphs for quicker reference.
How we worked through this problem. Colors and all.
Draw a rectangle to represent the task. It has an area of 80 square units because that's the LCD of the three fractions in the problem.
Because this grid represents the task, we use it to fill in the amount of work done. Paragraph [3] is the first concrete piece of information that allows us to do this.
We continue to fill in the work done as described in paragraph [4].
Paragraph [5] is the first piece of information that allows us to figure out C's rate. Knowing that C can do 16 boxes in 8 hours means C can do the task — 80 boxes — in 40 hours.
With C's rate, we can now take on paragraph [2]. We know from the last step that C's hourly rate working alone is 2 boxes per hour or 10 boxes in 5 hours. But when working with A, C's rate is 40% faster, therefore instead of getting just 10 boxes done, C can get 14 boxes done in 5 hours when working with A.
From picture above in green, we know A and C did 24 boxes in 5 hours, and since C was responsible for 14 of those, the remaining 10 boxes were done by A.
Then A's hourly rate when working with C is 2 boxes per hour. Because this hourly rate represents a 20% increase than if A were to work alone, the math we need to do is 2 boxes divided by 1.2 to get 5/3 boxes. Solving for x in the proportion below gives us the answer that A completes the task in 48 hours.
Lastly we use paragraph [1] to figure out rate for B. We know A's alone rate is 5/3 boxes per hour, but when working with B, A's rate is 40% faster. Thus we multiply 5/3 by 1.4 to get 7/3. If A can do 7/3 in 1 hour, then A can do 35/3 in 5 hours when working with B.
The yellow boxes show that A and B can do 25 boxes in 5 hours, so subtracting 35/3 from 25, we see that B did 40/3.
To get B's alone rate, we divide 40/3 by 1.2 (because B is 20% faster when working with A) to get 100/9. Solving the proportion below gives us the answer of B completing the task in 36 hours.
Technology and Construction Papers are Cool
Big-time struggles for my 8th graders on this problem from Five Triangles mathematics.
The one student who got it also struggled, but he was good about our rule of "never tell an answer." What I gathered from seeing their boards and listening to them explain:
They wanted to find the area of the parallelogram first.
So they needed to find the height.
To find the height, they reasoned that triangle ABC was isosceles, making the perpendicular bisector AY also be the height of the parallelogram. Then they could use the Pythagorean theorem to find AY. (I can't get AB and DC to be exactly 6.00 cm.)
So I showed them the parallelogram below just to be less helpful and to remind them about assuming something is isosceles because it looks it.
Without a clear way to find the height, frustration mounted.
But major props to them for persevering as you can tell from their boards that they tried to dissect the parallelogram into even more pieces in hoping they'd find what the shaded piece would be equal to.
The next day... I let them struggle some more. They weren't seeing the key pieces (at least to me they were key), so I told them to look at the "relationships" among the pieces. They were pretty sure the diagonals of a parallelogram cut it into 4 triangles of equal area. Then they were stuck again. I then asked them to construct this parallelogram using Geometer's Sketchpad (GSP) and find the answer to the question posed. Soon one student asked, "What should the angles be?" I replied, "It doesn't say in the problem, so I don't know. But it is a parallelogram, so make sure you have the same side lengths." Without much trouble, they found the answer. They also realized that even though they may not have created congruent parallelograms among themselves, they all came up with the answer of 0.17 or 1/6.
Me: So why did I ask you to use GSP to do this?
Student: Because we couldn't do it by hand?
M: Maybe. Or maybe you didn't have enough time. But why do we use GSP in general? What's the difference between doing a construction by hand and doing it using GSP?
S: So we can move things around.
M: Right! It's dynamic! Then this is what I want you all to do. Move things around. Drag the side lengths. Change the side lengths. But while you're doing all this messing around with the parallelogram, I want you to pay attention to the numbers, the measurements.
Not long before many of them chimed in excitedly: The ratio doesn't change! I came by each kid's screen to check their work. (These are my reconstructions of some that I saw.)
To make the most of their construction (and a good problem), I then asked them to find the ratios among all the pieces that they saw. I wish you could hear them. A bunch of them kept making the same exclamations: So cool! Mind blown. While only one student found the solution by hand, the rest of them felt pretty good about their construction of parallelograms, and they discovered important relationships among the pieces. Technology came to the rescue. Here's how I used colored construction papers to help students see the relationships better.
Advantages:
Instead of having to write down or say "triangle ABC," "triangle BEC," or "quadrilateral FDGE," I can just refer to each one by color.
By not having to follow the letters of ABC or GCE, kids can focus on the visuals and see the relationships more quickly.
I can show congruence by placing one piece on top of another.
Something like this:
The diagonals cut the parallelogram into two pairs of congruent triangles. Therefore, each blue is 1/4 of whole. (I reflected each pair so they can see the congruence.)
Below left: green is 1/2 of whole.
Below right: red + yellow = 1/2 of green, or 1/4 of whole, because they share the same height and half the base.
Below right: red + pink is 1/4 of whole (same size as a blue). Since left and right images below are equal in area, and red is red, therefore yellow equals pink.
Blue + yellow (combined) is a similar triangle with pink due to AA postulate. And because their side lengths are 6 to 3, or 2 to 1, then their areas are 4 to 1. Let's call the area of pink as 1, and we learned from above that yellow equals pink, so yellow is also 1. This leaves blue to be 3.
Putting all the pieces together, we have a total area of 12, so the shaded part (red) is 2/12 or 1/6.
Add to what Robert said, your kids have enough GSP skills to use it to investigate a problem. Kudos! That's a tough trick to pull off. I did it a different way! I found constructing a supporting parallel line dissected the quadrilateral in a helpful way. http://www.geogebratube.org/student/m83241
February 10, 2014 12:10 PMfawnnguyen wrote:
Hi Kate. Yay, beautiful work!! We did this activity just last week and one of the kids asked at the start, "How do you find the area of a non-parallelogram or trapezoid [FDEG] anyway?" I replied, "Well, can you divide that shape into other shapes that you can find the areas for?" So, I saw the groups draw in that parallel line that you have. They were able to find the area of pink triangle as 1/8 of whole but struggled with finding area of blue triangle during their paper/pencil work.Thank you, Kate.
Fraction Division via Rectangles
I appreciate Christopher Danielson's post on common numerator fraction division because it's important to examine how various algorithms work and how we can help our students become more flexible with their thinking. It's not surprising that I teach fraction division using rectangles, and I really believe the kids seem to grasp it better because it's visual.
I'll start with this problem: 3/4 ÷ 2/3. But before we do fraction division, I ask kids about whole number division. What is 8 ÷ 2? What is 15 ÷ 5? Eventually we settle on something like: asking what is 8 divided by 2 is the same as asking how many groups of 2 are in 8. Then we apply the same question to 3/4 ÷ 2/3 as "how many groups of 2/3 are in 3/4?" I guide them through this process:
Me: Let's draw out 3/4 and 2/3 on paper.
Half of them draw circles. Awful, drunk, ill-behaved circles.
M: Let's use grid paper instead to draw our rectangles. I think you can show 3/4 much more accurately on grid paper than on a circle. Please draw 2 rectangles of the same size.
(By doing this, we are really dividing two fractions using the common denominator strategy. Christopher writes about it here.)
Students: Any size?
M: What size do you think? Does it matter? Shade the first one to show 3/4 and the second one to show 2/3.
They mess up. They might draw a 1 x 4 rectangle, shade in 3 to show 3/4. But they don't quite know how to shade in 2/3 of a 1 x 4.
M: So maybe we should think about the size of the rectangle more carefully. Look at the problem again. Three-fourths divided by two-thirds. Hmmm... What dimensions should our rectangles have so it's easy to divide into fourths and thirds.
This prompt is enough for someone to say, Draw a 4 by 3 rectangle!
M: Bingo! I'm drawing these with you. Okay, so two rectangles of 4 by 3 — or 3 by 4 — doesn't matter. I'm shading in 3/4 on the first one and 2/3 on the second one. So our question is: How many groups of 2/3 are in 3/4? Because I colored mine in, can you help me ask the question again using colors instead?
Someone responds, How many pinks are in the greens?
M: Yeah. And how many little squares are pink? Okay, eight. So, I'm going over to the green here and round up 8 pink squares. I'm able to round up one group of 2/3 (pink) in the 3/4 (green).
Someone says, There's one left over.
M: How much is this one little green square left over worth? Right! 1/8 because we called 8 little boxes as one, so 1 little box must be 1/8. Our answer then is 1 and 1/8.
A few students say, I get it.
M: How do we know that our answer of 1 1/8 is correct? Okay, we'll use a calculator.
I purposely use an online calculator where I'm entering the fractions as they appear. I don't need to distract them right now with decimals or talk about parentheses. This is from CalculatorSoup.
M: Let's do this again. Now with a mixed number just for fun. Let's do 1 1/2 ÷ 2/5. How many rectangles are we drawing? What dimensions should they be? Oh, but we have more than 1 whole here, so...? We should have something like this then.
They say, How many groups of orange are in blue?
M: So let me round up the groups of orange that are in the blue. I got three. And the leftover is? Right, three. Three out of...?
More students say, Three-fourths! Three and three-fourths. I get this!
This online calculator from Calcul allows for entries of mixed numbers.
M: Okay, your turn to do one all by yourself. Please do 2/3 ÷ 1/2. (Same one Christopher used.)
I think these kids' papers show understanding.
While these are not there yet. I don't know. But it seems that drawing pictures and doing more visual stuff start to disappear in middle school.
Below is our textbook's treatment of "dividing fractions and mixed numbers" — Chapter 5, Section 7 — the full 3 pages before the Exercises.
Notice the two circles at the start of the section — that's pretty much it. And circles are great if you have denominators of 2, 4, and 8. I think if I can get my kids to first see the answer, then I can sell them the other algorithms — like multiply the reciprocal — and not come across as a fraud.
I also want to point out that I normally see this visual below for division of fractions. My way is different than this — I deliberately ask kids to draw 2 rectangles whose dimensions are the denominators.
[Update 01/07/2017]
Thank you to Rachel Emily Tabak for creating this accompanying worksheet, 18 - Frac division rectangles
Venturing Into the Sequel of Penny Pyramid
I didn't get around to doing Penny Pyramid when I first saw it last year. But Dan's 3-post series and Nathan's recent mention of it were the reminders I needed to make it happen.
Act 1
how many pennies
how much money is that
how long did it take
who in their right mind would do this/who has that patience
how much does it weigh/is the table gonna collapse
what is the volume/surface area/height
what is the ratio of pennies from one level to the level above it
(Student who gave the highest high guess did correctly say her written number as "one hundred quadrillion." It made me happy that she knew this.)
Acts 2 and 3
Lauren F: Is there a way to multiply consecutive numbers quickly? You showed us the addition one...
Maddie: Isn't that the exclamation point operation?
Gabe: But we're not multiplying consecutive numbers!
Mia: Doing 40 by 40 then by 13 gives all huge numbers, so we're doing a simpler problem, then find an equation.
Lauren P: Our group is finding a pattern and making a table.
Gwen: We're doing layer by layer. There are more of us (4 instead of 3), so it's pretty quick to divide up the work.
Gabe: I already have the answer because I was too eager to do the math, but I didn't say anything to the group. (He got the answer about 2 minutes after we formed groups.)
Julia: And I got it 3 or 4 minutes after Gabe.
Angela: And I got the answer after Julia. Without her help.
Me [to Gabe, Julia, and Angela who were in same group]: Aren't you guys special. You seriously just sat there and did nothing then while I walked around?
Julia: Well, yeah, we're kinda admiring our work.
Me: Geez Louise. What do you think I'd have asked you if I knew you'd found the answer to this pyramid?
Gabe: If it was 100 high?
Me: No. A million high. A billion high.
Gabe: Hehe. That's why we didn't want to say that we're done.
Two students figured out why each stack had 13 pennies.
Their other questions were answered to their satisfaction, except we didn't know exactly how long it took Mr. Bezos to build it, but we talked about how we might be able to estimate this.
Kids remembered from last week's lesson that a square pyramid has 1/3 the volume of a cube with same dimensions, but that our penny pyramid had jagged lateral edges.
While everything up to this point had gone as well as I'd expected. Kids immediately responded to the video with WOAHs and WOWs. They asked solid questions in both Acts 1 and 2. They worked well in groups.
However, the kids and I knew that no one really struggled with the task of just finding the number of pennies. The math was pretty basic and with a calculator, 40 layers of pennies didn't make anyone break a sweat.
What was meant as an "extension" or "sequel" really needed to now become the focus of our lesson — at least for this group of students who valued a good struggle. We needed to try to figure out the equation for this penny pyramid.
But I also realized that it would be very unlikely for my 8th graders to come up with the equation because it involved summation of a sequence. (You're right, Nathan, it is unlikely, even for Gabe.) But the process of getting there might be worth it. I wouldn't be their teacher if I didn't ask them to explore the patterns that they might see along the way.
I gave them small interlocking cubes and colored chips so they could build smaller models of the pyramid.
Their collective frustration arose from how "simple" the pyramid was built — nothing more than a sum of layers whose square dimensions were consecutive.
Incomplete Cube
We started with a smaller problem. We did a 5 x 5 square pyramid with a height of 5. We didn't like the "jagged" lateral edges of the pyramid either, hence we pushed the cubes into one corner like this so at least the cubes stacked squarely.
One way would be to imagine that we had a whole 5 x 5 x 5 cube, then subtract from this the small cubes that were missing. We noticed the missing pieces were these L-shapes.
We see a pattern in these missing L-shapes:
4 pieces of (2n-1) or (n-1)(2n-1) or (2n^2)-3n+1
3 pieces of [2(n-1)-1] or (n-2)(2n-3) or (2n^2)-7n+6
2 pieces of [2(n-2)-1] or (n-3)(2n-5) or (2n^2)-11n+15
1 piece of [2(n-3)-1] or (n-4)(2n-7) or (2n^2)-15n+28
Incomplete Rectangle
How else can we see this pyramid? Because my mind has a tendency to reshape things into rectangles, I flattened the pyramid into an incomplete rectangle like this:
The dimensions of the rectangle were straightforward enough, and unlike the missing L-shapes of the incomplete cube, the missing pieces here were rectangular and came in pairs. For example, in the above right sketch, the missing pieces were two 1 x 4 and two 2 x 3 rectangles. But if n were even, then the number of missing pieces would be pairs of rectangles plus 1 lone square piece.
I talked with them about the sigma notation, and since they knew how to add {1 + 2 +... + n} quickly — we refer to this as "Gauss addition" in class — they thought it was fun to learn the new symbol.
Then we went into WolframAlpha and typed in what we wanted. The equation came up with the "newly" learned summation notation.
The kids saw patterns. They learned a fancy new sign. They knew that the right math could help solve for any penny pyramid. But I really think they look forward to learning more math in high school.
I'd like to feature this comment from the old blog:
May 19, 2013 2:21 PM
l hodge wrote:
If you draw two copies of the rectangle sketch mirroring each other, with a 1 unit space between them, you have a nice sum of squares proof. The space between the two copies is easily seen as a re-arranged sum of squares. Divide the area of expanded rectangle by 3 and you have your formula.
May 20, 2013 2:41 PMfawnnguyen wrote:
Thank you, l hodge! Mind blown. So happy to know that we were on the right track of flattening out the pyramid into an incomplete triangle. We did make another copy of the flattened pyramid but turned it around (1800 rotation) to look at that double-pyramid-with-extra-spaces rectangle, but time ran out. So, we drew this together in class today. So #nguyening!!
When I Let Them Own the Problem
From our textbook:
Stuff like this makes my heart sink. There is essentially nothing left in this problem for students to explore and figure out on their own. If anything, all those labels with numbers and variables conspire to turn kids off to math. Ironically even when the problem tells kids what to do (use similar triangles), the first thing kids say when they see a problem like this is, "I don't get it."
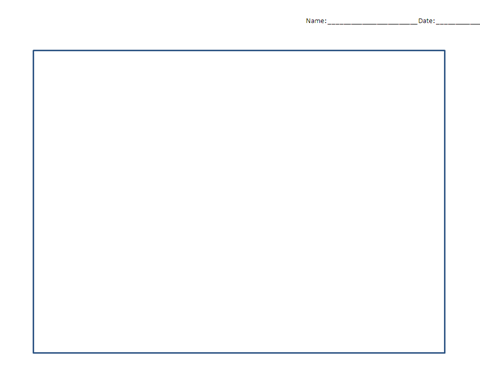
They say they don't get it because they never got to own the problem. I wiped out the entire question and gave each student this mostly blank piece of paper and the following verbal instructions:
Make sure you have a sharpened pencil. Write your name and date.
Inside this large rectangular border, draw a blob — yes, blob — with an area that's approximately 1/5 of the rectangle's area.
Next, draw a dot anywhere inside the rectangle but outside the blob. Label this dot H.
Now, draw another dot — but listen carefully! — so that there's no direct path from this dot to the first dot H. Label this second dot B.
I asked the class if they knew what they just drew. After a few silly guesses, I told them it was a miniature golf course: blob = water, point B = golf ball, point H = hole location.
The challenge then was to get the ball into the hole. Since you can't putt the ball directly into the hole due to the water hazard, you need to make a bank shot.
(Some students may have drawn the blob and points in such a way that this was not really possible, at least not in one-bank shot. I let them just randomly pull from the stack of copies to pick a different one. I made a copy of their sketches first before they started their work.)
The discussions began as they started drawing in the paths. One student drew hers in quickly and asked, "Is this right?" I replied, "I'm not sure, but that's my challenge to you. You need to convince me and your classmates that the ball hitting the edge right there will bounce out and travel straight into the hole. Does it? What can you draw? What calculations are involved?"
What I heard:
The angle that the ball hits the border and bounces back out must be the same.
Because we're talking about angles, something about triangles.
This is like shooting pool.
Right triangles.
Similar right triangles.
Do we need to consider the velocity of the ball?
This is hard.
I can't figure out how to use the right triangles.
Similar right triangles because that'll make things easier.
Even though it's more than one bounce off the edges, I'm still just hitting the ball one time.
I think I got this.
I have an idea.
Wish my golfer is Happy Gilmore.
BIG struggles, so I was happy and tried not to be too helpful. (I struggled big time too on some of their papers! And I think this made them happy.)
Lauren explained in this 55-second video how she found the paths for the ball to travel. I also had her explain to the whole class later at the document camera.
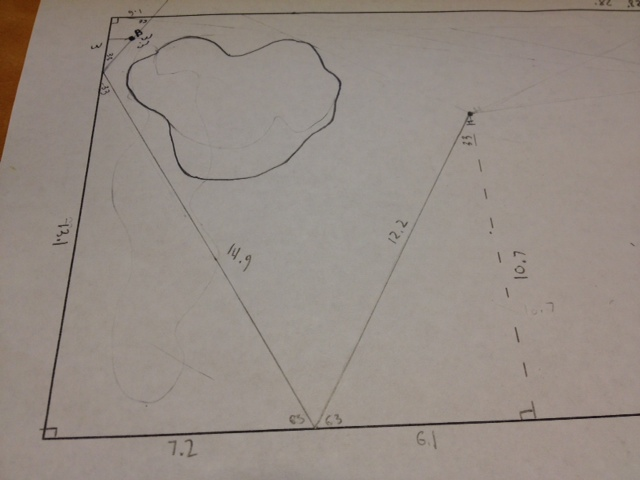
Jack took a different approach. Instead of measuring the sides and finding proportions to find more sides to create similar triangles like Lauren did, he started with an angle that he thought might work [via eyeballing] and kept having the ball bounce off the borders at paired angle until it went into the hole. (His calculation was off — or his protractor use was inaccurate — as he had angles of 90, 33, and 63. Or maybe if he had a better teacher, he'd know the sum of the interior angles of a triangle was 180.)
Gabe was quieter than usual today. When he finally shared, his classmates realized he was the only one to solve the entire problem using just constructions with a straightedge and compass. He walked us through his series of constructions until he found point C on the bottom border where the ball needed to bank off and end up in hole H.
Imagine none of this thinking and sharing would have occurred if I had given them problem #24 in the book. Half of my kids were still struggling and working to find the correct bank shot(s), but they were given the chance to struggle. And none of them said, "I don't get it."
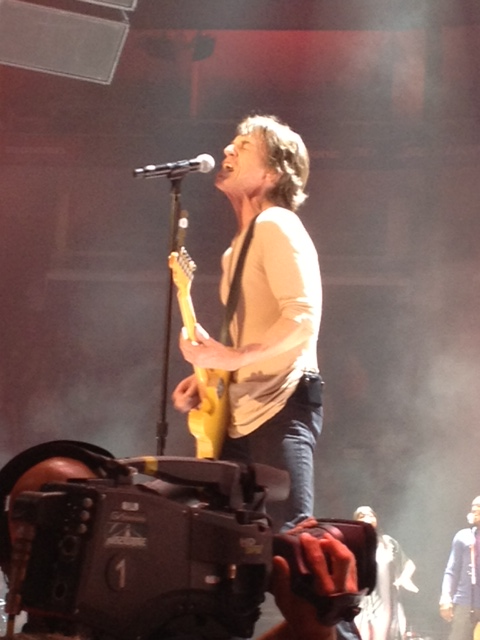
The cutest thing also happened while we were doing all this math. Yesterday (Monday) I bragged to the kids — and I'm doing it again right now — about the Rolling Stones concert that we went to on Friday. I am still over the moon ecstatic that we got escorted into the Pit from our way-in-back-floor-seats!!!!
Anyway, a kid today started humming to the tune of (I Can't Get No) Satisfaction and quickly others joined in with THESE LYRICS:
I can't get no similar triangles
I can't get no similar triangles'
Cause I try and I try and I try and I try
I can't get no, I can't get no
When I'm drawing in my lines
Updated 05/08/13
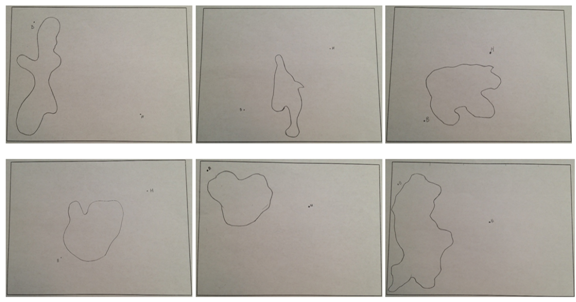
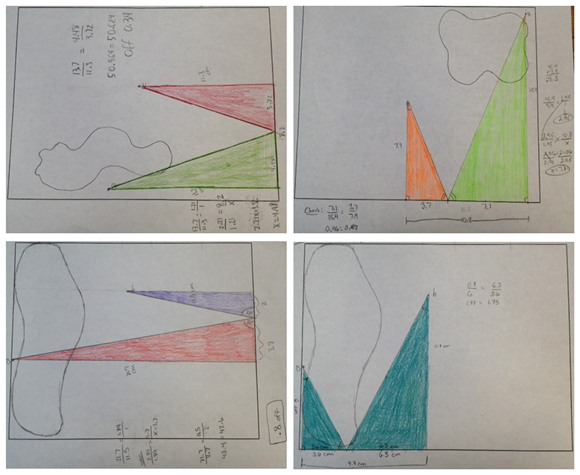
Today I had the kids work on someone else's paper (remember I made copies of their papers before they worked on them) and find similar triangles to make the bank shots. Because I purposely told the kids to draw in the blobs and the 2 points without any mention of where exactly to place them, it was then by chance that these papers below allowed for one-bank shots to get the ball into the hole.
The ones below, however, are some of the ones that would not work with just one-bank shots, but I had the kids create similar triangles on them anyway because that was the learning goal of the lesson.
This lesson leaves me so full and proud. Their singing to the Stones while struggling in math makes me crazy in love with them.
Look what the crazy and wonderful Desmos did:
Updated 06/28/14
There were over 90 comments left for this post on the old site, but I'd like to feature this thread of comments between me and hillby as it involves us sharing some geometric constructions.
May 8, 2013 7:06 AM hillby wrote:
Awesome lesson, excellent job of breaking the problem down, increasing cognitive demand and also getting students to share their thought process.It took me a while to figure out how Gabe was able to find the point exactly with just some lines and a compass. I stumbled upon it, but I haven't figured out why it worked. Did Gabe figure out that this approach would work through reasoning, or trial and error like me? I guess I'm basically asking if he added a proof, or did he check by measurement?
May 8, 2013 10:20 PMfawnnguyen wrote:
Thank you, Chris! I'm really glad you questioned Gabe's constructions. I wrote down his steps and re-created it on GSP so you could see:
B is ball. H is hole. Construct BA and HD, both perpendicular to horizontal bottom line. Both have the same measurements as what he wrote on his paper.
Draw in HA, forming angle(AHD).
Copy angle(AHD) over to angle(GBA).
Now this is his "just a hunch" step: construct the midpoint of AD, label this E.
Construct the midpoint of AG, label this F.
Construct the midpoint of FE, label this C.
Draw in BC and HC, forming the yellow and green triangles.
He just checked by measurement. What do you think?
May 9, 2013 7:30 PM hillby wrote:
Oh, how INTERESTING!! I did something similar based on the picture in the post, but it wasn't quite the same. On the other hand, I got a perfect match.
Picking up from BA & HD,
Draw in HA
Draw in BD
Draw in a line perpendicular to AD through the intersection of BD & HA
The intersection of the perpendicular and line AD will be your exact point of reflection.
I think Gabe's method is similar to the Newtonian method of finding zeros — he's basically iterating closer and closer to that exact point of reflection.
May 9, 2013 7:54 PMfawnnguyen wrote:
And look how beautiful yours looks! I will share your construction with Gabe. I love how Gabe persevered on this problem and appreciate his "hunch" too — it's a risk I want more kids to take! You can see his tedious work of constructing those midpoints. Any other kid would have just eyeballed it or used a ruler. Thanks again, Chris.
When I Got Them to Beg
A quick flip to the quadratics section in each of the six textbooks lying around here I find at least one problem about finding the width of some border. The concrete around a pool, the walkway around a garden, the frame around a picture, the border around a rug. I present to you the collage.
I don't know.
And because I don't quite know what else to do, I come up with a lame lesson idea: make the kids create a frame around a picture given a specified amount of frame, this should drive them bonkers as they won't be able to do it perfectly (not even close!), and then they'll beg me to show them the math to make this task easier. They beg, I win.
I give them the goods. To each kid:
scissors
ruler
any old picture, size 6 cm x 11 cm
a white frame, 4 cm x 7 cm (but they get 4 of these because they'll mess up!!)
My one-way conversation with them about the task. I do the talking:
Framing is very expensive. Even if you have the 50%-off coupon, it still costs a lot. For example, last year I took my son's art work that he'd done for his IB Art class to Aaron Brothers to get them framed. I wanted them matted also — you do know that matting is a fancy word for cardboard so they can charge you more, right? — anyway, guess how much the total was? Over four hundred dollars! Four-hundred-dollars-and-that's-with-the-friggin'-coupon.
I told the sales guy, "My son is not Picasso. His drawings are half crap. I don't even want them, you can keep them."
So, your job today is to be a picture framer. Show me which one is the picture... Good. Now, hold up the piece that is the frame... Good. Think of that piece of frame as gold. It's expensive.
How come I gave you 4 frames?... That's right, you'll probably make mistakes, so you get 4 trials.
Your job is to cut your [expensive gold] frame into pieces — strips — that will go around your picture. You have to use the entire 4 cm x 7 cm piece with no leftovers.
But you don't want to cut it into a million pieces either. Fewer cuts means fewer pieces to seal back together to form a frame. And it looks nicer.
Do-you-have-any-questions?-no?-good-begin.
Almost immediately, I hear:
Marissa: What do we do?
Me: I just... e x p l a i n e d...
Malainy: I'll tell her, Mrs. Win. Okay, you cut up the picture to make it fit into...
Me: What?! Cut the picture?! People bring in their most precious picture to you to frame and you cut up their picture?!
Malainy: Oohh noo. Then I'm not sure what we're doing.
Someone: Do the pieces have to be even?
Me: Have you ever seen a frame with different widths?
A Different Someone: I don't get what we're doing.
Me: Should I just speak Chinese to you guys from now on?
Yep. This is pretty much a verbatim snippet of what goes on in my last period today.
After lighting my hair on fire, they manage to work diligently.
Sure enough. About 15 minutes later they grow tired of the frame pieces. A few almost have it, but they know this is not good enough.
They speak up:
There must be a better way to do this!
I'm gonna be fired because I'm wasting all these gold frames and still not getting it right.
My pieces are thick and thin everywhere.
I always have this left over stupid piece!
And here comes the money:
Can you please show us the math for this?
Updated 04/11/13
Thank you to Christopher for sharing with me on Twitter his 3 trials:
Updated 04/16/13
Thank you to Mike Lawler for sharing this video of him working through this problem with his young son.
Des-man
Not only was this so great to reinforce slope, y-intercept, and all the coefficients, it also allowed us to talk about domain and range.
What I heard around the room (that I can remember):
Oh, I get this now! I see what changing this number does!
Oops, I made his face too wide!
His smile is crooked. But I think I'll leave it because he looks cool that way.
Ha!! I see my mistake, I said x had to be greater than 4 but less than 2. Silly me.
I want the eyes to be oval shaped though. My plan is to make 2 parabolas opening into each other.
Can we work on this in 6th period too?
When I saw two students whose graphs were circles for faces, I knew they'd copied these from Desmos gallery as we haven't — and won't — learn circle equations in Algebra 1.
I reminded them of the minimum requirements, but I told the class that they may copy equations and tinker with them to add other features, such as hair and whiskers. (I actually said "whiskers," and Lexi had to tell me, "Whiskers? On a man? You mean beard or mustache?") People don't have whiskers? Good to know.
I made my guys' eyes elliptical and tweeted it, the good folks at Desmos responded.
So cool!
I think we got a lot of mileage from this activity. It's a good sign when teacher instruction is minimal and student engagement and discussion are high.
Just in case you missed the Grand Opening of Daily Desmos about 3 weeks ago, brought to us by Michael Fenton, inspired by Dan Anderson.
Smallest and Largest
Most of my 6th graders struggled with this handout today. Only 4 of 36 students scored 8 out of 8 on it. I offered no help on this except my reading the instructions to them and reiterating that for each operation, the two numbers must be different.
I retyped this task from the Noyce Foundation.
If you teach 6th grade math or if you could share this with a colleague who does, I'd be very curious to learn how your kids might do on this. (Guess I'm now wondering how 7th and 8th graders fare on this too.)
I'm feeling disheartened and ineffective with this group of 37 kids. If I squinted really hard, then maybe I could spot just a few tiny specks of mathematical growth in them.
This teaching thing is tough.
Students Embroiled in Conway's Rational Tangles
Me: We're going to do an activity today.
Jonathan: Let me guess. It's your favorite activity.
M: How did you know that?
J: You say that about everything we do.
M: You have a problem with that?
J: No. But I've lost track of how many favorites you have.
M: And I've lost track of how many times you've talked without permission.
M: But I still love you though.
J: I love you too, Mrs. Win.
Yeah, so that was the exchange we had at the start of Algebra. Kids are used to me telling them how much I love them because I really do. It's the Monday-through-Friday kind of love that lasts from 8:25 am to 2:50 pm — at which time I say to them, "Get out of my room." They laugh at this; they must think I'm kidding.
Tom Davis did John Conway's Rational Tangles with us at last summer's Math Teachers' Circle (MTC). Reading this post (with lots of solid links) over the weekend reminded me of this fun lesson.
I haven't come across a written lesson of this done with school children though. So, here I am. It's my new favorite lesson.
Day 1
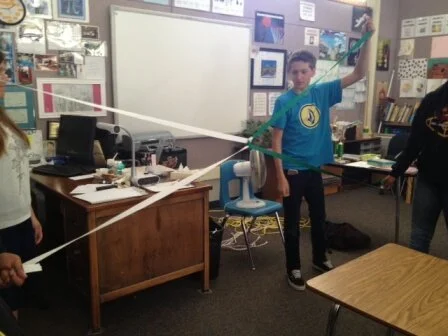
I use the two ropes given to us from the MTC training.
I ask for 4 student volunteers to come up front. The rest of the class needs to pay careful attention and record in their math journals what I record.
Important
The two ropes can be of the same color. Two colors are used in practice so it's easier for students to follow along.
The 4 people holding the robes can be identical quadruplets — who they are doesn't matter, but I'm referring to them as colored dots if and only if they move or change position.
The letters A, B, C, and D refer to the 4 positions, like goalposts, therefore they do not change.
The starting position is when the two ropes are horizontally parallel, and this state has a value of 0.
There are only TWO "moves" in this game of rational tangling and untangling.
A TWIST is when people in positions A and C switch places. Green moves underneath red's rope.
This move equals plus 1, meaning our ropes went from a value of 0 to a value of 1.
The only other move is called ROTATE. A rotate is when the 4 people move in a clockwise direction, each person taking the space previously occupied by the person to his/her left.
Now, the money question to the kids: What does the operation "rotate" do to the value of the ropes?
We know a twist = +1, but a rotate = ??
So, in the diagram just above, our ropes went from a value of 0 to what value?
The kids want to do a twist after this rotate, but they realize that the ropes are now funny — or vertically parallel — that you can't do a twist since there's no rope for yellow to go under, and green and yellow switching places does not change how the ropes look.
Because a twist can't be done, our only other choice is to rotate — which leads us to this configuration.
AHA! This brings us back to 0 because the ropes are horizontally parallel again.
Symbolically, we can record what happens with 2 rotates (R), done back to back, when we start with 0: 0 (R) -> ? (R) -> 0.
We need to test this again, so let's start at 0. Do 1 twist (T), then 2 rotates. This means the value goes from 0 to +1, then to some unknown value after the first rotate, but after the second rotate, the ropes have a value of +1 again.
0 (T) -> 1 (R) -> ? (R) -> 1
Someone suggests that the rotate operation means multiply by -1. This is a lovely suggestion as it seems to work: a twist of 0 makes it +1, then if a rotate means multiply by -1, then we have -1, then another rotate makes it +1 again.
Then we try to do 2 twists from 0, giving us +2. So if we do a rotate now, our value should be -2. This means we can then do 2 twists to add 2, bringing us back to 0. But it did not work!
We do a few more test moves. Someone suggests a rotate subtracts 2. Others suggest that it throws a negative sign on the value somehow, somewhere. The kids are struggling. One claims a massive headache from all this, to which I say, "Enjoy that, honey."
We have a few conjectures though:
Starting from 0 and doing 1 rotate puts our ropes in a weird (undefined?) state where we can't do a twist after that.
Two rotates, back to back, bring the ropes back to the same state prior to the first rotate. Therefore, we should not do 2 consecutive rotates unless we just want to waste time.
A rotate must involve a negative — how else can we get back to 0 by twisting alone?
I instruct the 4 volunteers through this entire sequence of moves below. The class and I record each step. As soon as we put in a rotate, however, and not know exactly what this move does to the value, we just have to put question marks in all these spaces.
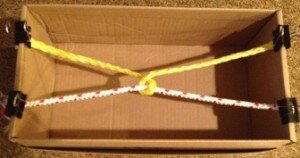
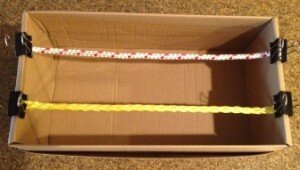
I can't take pictures of the kids doing this while also teaching them, so I've re-created this at home with a shoe box and 4 well-behaved binder clips that act has the rope holders.
Step 1: Start at 0.
Step 2: Do 1 twist. Value now is 1.
Step 3: Another twist. Value = 2.
Step 4: Another twist. Value = 3.
Step 5: Rotate. Value = ??
Step 6: Twist. Value = ??
Step 7: Rotate. Value = ??
Steps 8 & 9: Twist and twist again. Value = ??
Step 10: Rotate. Value = ??
Step 11: Twist. Value = ??
Step 12: Twist. Value = 0
Kids realize that if the last two twists got the ropes back to 0, then Step 10 must have a value of -2, and Step 11 is -1.
After about 20 minutes of doing the dance with the ropes and agonizing, a couple of geometry kids figured out what a rotate does to the value of the ropes. Algebra kids did not have enough time, so they'll continue their investigation on Day 2. Because I only see my 6th graders one period a day (instead of 2 periods/day for algebra and geometry) and they being younger, I told them what "rotate" does mathematically. There will still be plenty of math for them to do on Day 2.
Day 2
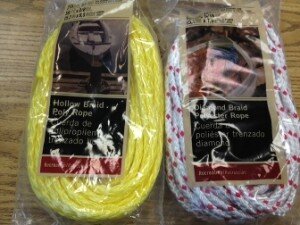
It's more fun when the kids can participate instead of just watching the 4 kids in front of the room. I go to Lowe's to pick up the ropes for about $12.
Kids will be in groups of five, four are holding the ropes and doing the moves, one person records and oversees that everyone in group is moving appropriately. Each group gets 2 ropes, one of each color, and each rope is about 7 feet long.
All the groups will first follow the same set of crazy tangle moves that I give them. Something like, "Start at 0, twist 4 times, rotate, twist 2 times, rotate, twist 3 times, rotate, twist 5 times. Okay, now figure out how to get back to 0."
(Algebra kids still need to figure out what a rotate does to the value of the ropes before they break out into groups.)
When they figure out my tangle, I'll have each team create their own tangle and undo the mess. Of course they'll have to record all the moves from 0 and back to 0 symbolically.
How will your kids figure out what the "rotate" operation does?
Update 03/13/12
As planned, I had the kids in groups of 5 and made this tangle: Start at 0, twist 3 times, rotate, twist twice, rotate, twist 5 times. Then they had to untangle this and get back to 0.
How the kids persevered through this entire problem was really amazing.
They hugged each other and jumped for joy when they untangled the ropes. Especially touching was the group that was the last to solve the problem — wish I'd captured it on camera/video.
This group was first to find the solution. (They had to create one of their own after this.)
If above video is not enough to convince you to do this with your kids, here's a tweet from Sam this morning. Imagine that — this activity blew young Sam's brilliant mind.
Math Taboo Game
Pretty sure I lied to my algebra students when I announced abruptly, "Let's play this game. It's a lot of fun!"
I had never played the game before as I just thought of it when I spoke the words. (They were doing polynomial factoring and were being so nice and quiet. I can't stand "nice and quiet" in my math class, so I had to disrupt them and wanted to play a game.)
I thought of playing Taboo using math vocabulary. In case you're not familiar with it, the object of the game is get your teammate to say a certain word on the card without using the "taboo" words. For example, describe VEAL without using the words CALF, YOUNG, PARMIGIANA, CUTLET, BOX.
My instructions:
Take out a piece of paper, fold it into quarters and tear neatly so you have 4 small pieces of paper.
Open up your math book and look for vocabulary words that we've covered already.
At the top of each piece of paper, write a word (or phrase) that you want people to describe, box this word up.
Then underneath this word, write 4 taboo words that the describer may not use.
Don't share what you're doing, wouldn't be fun if others saw what you wrote.
I need each person to complete 4 of these.
When done, fold each piece of paper exactly in half — like this (you have to show them) — and drop them all in this bucket.
A few simple rules:
Class is divided into 2 teams, Team X and Team Y.
Team X goes first: one person from Team X comes up to front, reaches into bucket to get one slip of paper and has 60 seconds to describe as many words as possible to the teammates.
Teacher stands next to the describer to make sure none of the taboo words or the main word itself is said — round is over if this happens.
Skipping a word is not allowed.
Hand gestures are okay (one describer today put his arms out in parallel fashion to get his teammates to say "perpendicular" — who's his math teacher?
Teacher reserves the right to help out whichever team she likes better.
So, yeah, we had a ton of fun. It was the last period of the day, and they didn't want to leave when the bell rang!
This went so well that I'll make a "real" game out of this. I'll print the words onto mailing labels. Then I can stick them on the back of playing cards so they are shuffle-able.


