My Other Math Sites
Lessons From the Classroom
Technology and Construction Papers are Cool
Big-time struggles for my 8th graders on this problem from Five Triangles mathematics.
The one student who got it also struggled, but he was good about our rule of "never tell an answer." What I gathered from seeing their boards and listening to them explain:
They wanted to find the area of the parallelogram first.
So they needed to find the height.
To find the height, they reasoned that triangle ABC was isosceles, making the perpendicular bisector AY also be the height of the parallelogram. Then they could use the Pythagorean theorem to find AY. (I can't get AB and DC to be exactly 6.00 cm.)
So I showed them the parallelogram below just to be less helpful and to remind them about assuming something is isosceles because it looks it.
Without a clear way to find the height, frustration mounted.
But major props to them for persevering as you can tell from their boards that they tried to dissect the parallelogram into even more pieces in hoping they'd find what the shaded piece would be equal to.
The next day... I let them struggle some more. They weren't seeing the key pieces (at least to me they were key), so I told them to look at the "relationships" among the pieces. They were pretty sure the diagonals of a parallelogram cut it into 4 triangles of equal area. Then they were stuck again. I then asked them to construct this parallelogram using Geometer's Sketchpad (GSP) and find the answer to the question posed. Soon one student asked, "What should the angles be?" I replied, "It doesn't say in the problem, so I don't know. But it is a parallelogram, so make sure you have the same side lengths." Without much trouble, they found the answer. They also realized that even though they may not have created congruent parallelograms among themselves, they all came up with the answer of 0.17 or 1/6.
Me: So why did I ask you to use GSP to do this?
Student: Because we couldn't do it by hand?
M: Maybe. Or maybe you didn't have enough time. But why do we use GSP in general? What's the difference between doing a construction by hand and doing it using GSP?
S: So we can move things around.
M: Right! It's dynamic! Then this is what I want you all to do. Move things around. Drag the side lengths. Change the side lengths. But while you're doing all this messing around with the parallelogram, I want you to pay attention to the numbers, the measurements.
Not long before many of them chimed in excitedly: The ratio doesn't change! I came by each kid's screen to check their work. (These are my reconstructions of some that I saw.)
To make the most of their construction (and a good problem), I then asked them to find the ratios among all the pieces that they saw. I wish you could hear them. A bunch of them kept making the same exclamations: So cool! Mind blown. While only one student found the solution by hand, the rest of them felt pretty good about their construction of parallelograms, and they discovered important relationships among the pieces. Technology came to the rescue. Here's how I used colored construction papers to help students see the relationships better.
Advantages:
Instead of having to write down or say "triangle ABC," "triangle BEC," or "quadrilateral FDGE," I can just refer to each one by color.
By not having to follow the letters of ABC or GCE, kids can focus on the visuals and see the relationships more quickly.
I can show congruence by placing one piece on top of another.
Something like this:
The diagonals cut the parallelogram into two pairs of congruent triangles. Therefore, each blue is 1/4 of whole. (I reflected each pair so they can see the congruence.)
Below left: green is 1/2 of whole.
Below right: red + yellow = 1/2 of green, or 1/4 of whole, because they share the same height and half the base.
Below right: red + pink is 1/4 of whole (same size as a blue). Since left and right images below are equal in area, and red is red, therefore yellow equals pink.
Blue + yellow (combined) is a similar triangle with pink due to AA postulate. And because their side lengths are 6 to 3, or 2 to 1, then their areas are 4 to 1. Let's call the area of pink as 1, and we learned from above that yellow equals pink, so yellow is also 1. This leaves blue to be 3.
Putting all the pieces together, we have a total area of 12, so the shaded part (red) is 2/12 or 1/6.
Add to what Robert said, your kids have enough GSP skills to use it to investigate a problem. Kudos! That's a tough trick to pull off. I did it a different way! I found constructing a supporting parallel line dissected the quadrilateral in a helpful way. http://www.geogebratube.org/student/m83241
February 10, 2014 12:10 PMfawnnguyen wrote:
Hi Kate. Yay, beautiful work!! We did this activity just last week and one of the kids asked at the start, "How do you find the area of a non-parallelogram or trapezoid [FDEG] anyway?" I replied, "Well, can you divide that shape into other shapes that you can find the areas for?" So, I saw the groups draw in that parallel line that you have. They were able to find the area of pink triangle as 1/8 of whole but struggled with finding area of blue triangle during their paper/pencil work.Thank you, Kate.
When I Let Them Own the Problem
From our textbook:
Stuff like this makes my heart sink. There is essentially nothing left in this problem for students to explore and figure out on their own. If anything, all those labels with numbers and variables conspire to turn kids off to math. Ironically even when the problem tells kids what to do (use similar triangles), the first thing kids say when they see a problem like this is, "I don't get it."
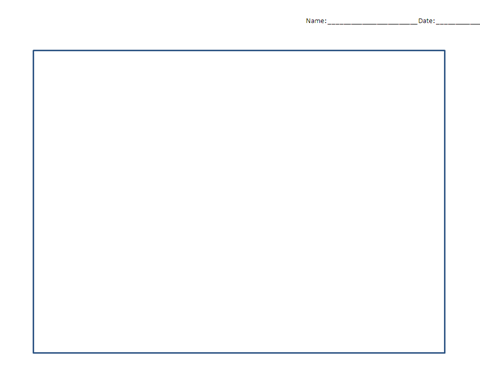
They say they don't get it because they never got to own the problem. I wiped out the entire question and gave each student this mostly blank piece of paper and the following verbal instructions:
Make sure you have a sharpened pencil. Write your name and date.
Inside this large rectangular border, draw a blob — yes, blob — with an area that's approximately 1/5 of the rectangle's area.
Next, draw a dot anywhere inside the rectangle but outside the blob. Label this dot H.
Now, draw another dot — but listen carefully! — so that there's no direct path from this dot to the first dot H. Label this second dot B.
I asked the class if they knew what they just drew. After a few silly guesses, I told them it was a miniature golf course: blob = water, point B = golf ball, point H = hole location.
The challenge then was to get the ball into the hole. Since you can't putt the ball directly into the hole due to the water hazard, you need to make a bank shot.
(Some students may have drawn the blob and points in such a way that this was not really possible, at least not in one-bank shot. I let them just randomly pull from the stack of copies to pick a different one. I made a copy of their sketches first before they started their work.)
The discussions began as they started drawing in the paths. One student drew hers in quickly and asked, "Is this right?" I replied, "I'm not sure, but that's my challenge to you. You need to convince me and your classmates that the ball hitting the edge right there will bounce out and travel straight into the hole. Does it? What can you draw? What calculations are involved?"
What I heard:
The angle that the ball hits the border and bounces back out must be the same.
Because we're talking about angles, something about triangles.
This is like shooting pool.
Right triangles.
Similar right triangles.
Do we need to consider the velocity of the ball?
This is hard.
I can't figure out how to use the right triangles.
Similar right triangles because that'll make things easier.
Even though it's more than one bounce off the edges, I'm still just hitting the ball one time.
I think I got this.
I have an idea.
Wish my golfer is Happy Gilmore.
BIG struggles, so I was happy and tried not to be too helpful. (I struggled big time too on some of their papers! And I think this made them happy.)
Lauren explained in this 55-second video how she found the paths for the ball to travel. I also had her explain to the whole class later at the document camera.
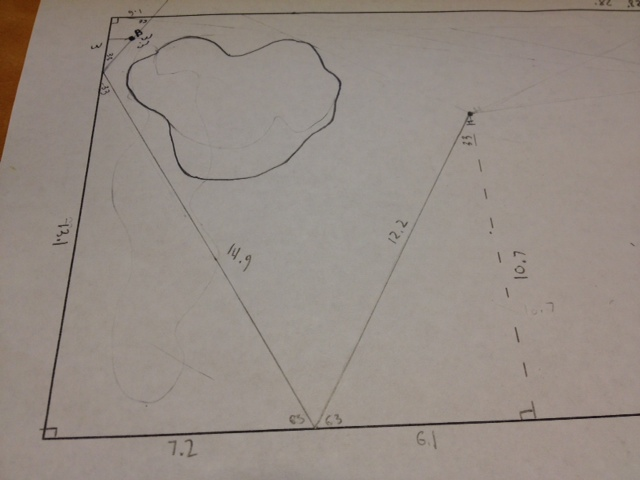
Jack took a different approach. Instead of measuring the sides and finding proportions to find more sides to create similar triangles like Lauren did, he started with an angle that he thought might work [via eyeballing] and kept having the ball bounce off the borders at paired angle until it went into the hole. (His calculation was off — or his protractor use was inaccurate — as he had angles of 90, 33, and 63. Or maybe if he had a better teacher, he'd know the sum of the interior angles of a triangle was 180.)
Gabe was quieter than usual today. When he finally shared, his classmates realized he was the only one to solve the entire problem using just constructions with a straightedge and compass. He walked us through his series of constructions until he found point C on the bottom border where the ball needed to bank off and end up in hole H.
Imagine none of this thinking and sharing would have occurred if I had given them problem #24 in the book. Half of my kids were still struggling and working to find the correct bank shot(s), but they were given the chance to struggle. And none of them said, "I don't get it."
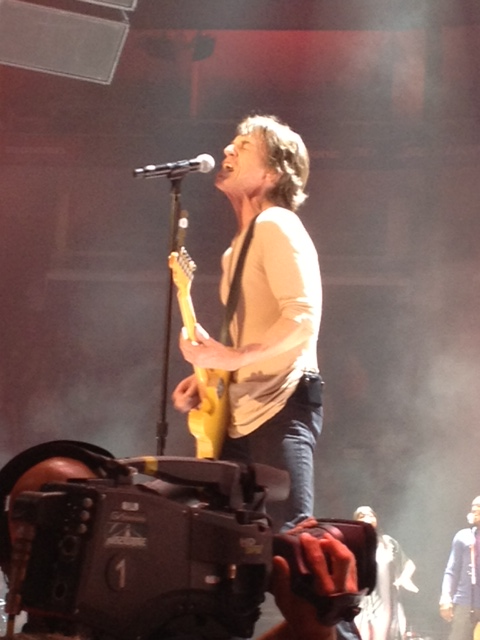
The cutest thing also happened while we were doing all this math. Yesterday (Monday) I bragged to the kids — and I'm doing it again right now — about the Rolling Stones concert that we went to on Friday. I am still over the moon ecstatic that we got escorted into the Pit from our way-in-back-floor-seats!!!!
Anyway, a kid today started humming to the tune of (I Can't Get No) Satisfaction and quickly others joined in with THESE LYRICS:
I can't get no similar triangles
I can't get no similar triangles'
Cause I try and I try and I try and I try
I can't get no, I can't get no
When I'm drawing in my lines
Updated 05/08/13
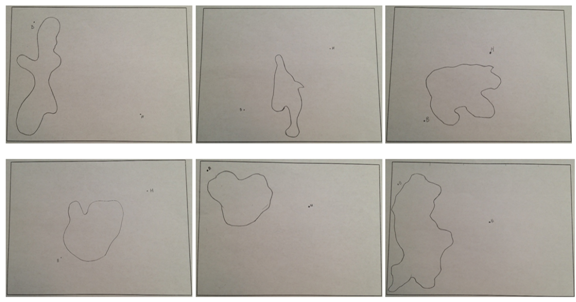
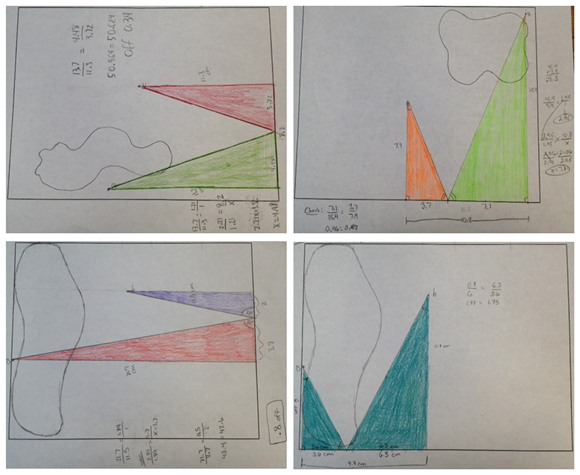
Today I had the kids work on someone else's paper (remember I made copies of their papers before they worked on them) and find similar triangles to make the bank shots. Because I purposely told the kids to draw in the blobs and the 2 points without any mention of where exactly to place them, it was then by chance that these papers below allowed for one-bank shots to get the ball into the hole.
The ones below, however, are some of the ones that would not work with just one-bank shots, but I had the kids create similar triangles on them anyway because that was the learning goal of the lesson.
This lesson leaves me so full and proud. Their singing to the Stones while struggling in math makes me crazy in love with them.
Look what the crazy and wonderful Desmos did:
Updated 06/28/14
There were over 90 comments left for this post on the old site, but I'd like to feature this thread of comments between me and hillby as it involves us sharing some geometric constructions.
May 8, 2013 7:06 AM hillby wrote:
Awesome lesson, excellent job of breaking the problem down, increasing cognitive demand and also getting students to share their thought process.It took me a while to figure out how Gabe was able to find the point exactly with just some lines and a compass. I stumbled upon it, but I haven't figured out why it worked. Did Gabe figure out that this approach would work through reasoning, or trial and error like me? I guess I'm basically asking if he added a proof, or did he check by measurement?
May 8, 2013 10:20 PMfawnnguyen wrote:
Thank you, Chris! I'm really glad you questioned Gabe's constructions. I wrote down his steps and re-created it on GSP so you could see:
B is ball. H is hole. Construct BA and HD, both perpendicular to horizontal bottom line. Both have the same measurements as what he wrote on his paper.
Draw in HA, forming angle(AHD).
Copy angle(AHD) over to angle(GBA).
Now this is his "just a hunch" step: construct the midpoint of AD, label this E.
Construct the midpoint of AG, label this F.
Construct the midpoint of FE, label this C.
Draw in BC and HC, forming the yellow and green triangles.
He just checked by measurement. What do you think?
May 9, 2013 7:30 PM hillby wrote:
Oh, how INTERESTING!! I did something similar based on the picture in the post, but it wasn't quite the same. On the other hand, I got a perfect match.
Picking up from BA & HD,
Draw in HA
Draw in BD
Draw in a line perpendicular to AD through the intersection of BD & HA
The intersection of the perpendicular and line AD will be your exact point of reflection.
I think Gabe's method is similar to the Newtonian method of finding zeros — he's basically iterating closer and closer to that exact point of reflection.
May 9, 2013 7:54 PMfawnnguyen wrote:
And look how beautiful yours looks! I will share your construction with Gabe. I love how Gabe persevered on this problem and appreciate his "hunch" too — it's a risk I want more kids to take! You can see his tedious work of constructing those midpoints. Any other kid would have just eyeballed it or used a ruler. Thanks again, Chris.


